


👇Table Of Content
Introduction
Getting started
Prerequisite
Installations
Counter
404 Error
Error Boundary
Conclusion
Intro
Howdy 👋 TechStars !
Is this your first time seeing an article I wrote? no worries you are not alone as this is my first time writing one🤣. So, I welcome us all 😊.
In this article, I will be sharing how I created a custom counter App with a home page, 404 page and error boundary testing page using React.
Getting started.
I would like to start by explaining the term React.
React is a JavaScript-based UI development library. Facebook and an open-source developer community run it. Although React is a library rather than a language, it is widely used in web development. The library first appeared in May 2013 and is now one of the most commonly used frontend libraries for web development.
Prerequisite
below 👇is the list of technology you'll will be using for this project
PC
Node(you should have node installed into your PC)
Vscode (or any code editor)
Git(optional)
Before diving fully into this, you should be familiar with the following.
Html
Css
Javascript
Reactjs
React Router
npm/yarn or any package installer
Install node
If you do not have Node installed, here is a step-by-step process on how to install it.
Install React
To install and initialize a new react app, you just have to type this command in your terminal
npm create-react-app tally-counter
This command creates a react application into folder named 'tally-counter.
You can read more about installing react with vite here if you encounter any difficulty.
Install React Router
next you will need to install react router DOM. This package will allow you to navigate between routes in your web page.u
npm install react-router-dom
Now that i have successfully installed all this. Let's get coding.
First I opened my r react folder in my code editor.
How to open react project In vscode.
A very easy way to do this is simply typing the command below on your terminal or gitbash
code .
For the above to work your terminal or gitbash should be in the directory of the folder you wish to open In vscode.
Folder Structure
For this project we will be implementing four different pages(home, about, error testing and a 404 page) and a navbar which will appear on all the page.
Initially a react project folder should look like this.
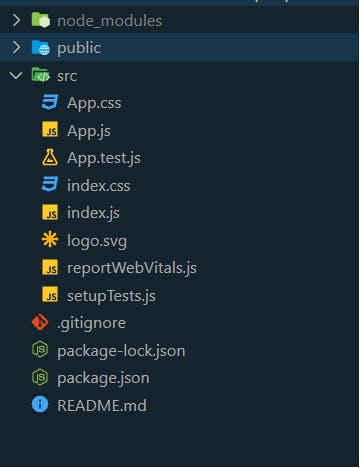
We can structure this project creating two folder inside our src folder. one for components the other for pages
the navbar and other components should be placed in the component folder. Then all the pages we will be implementing should be placed in the pages folder.
your css file should also reside in a folder named styles . The components folder should have it's own styles folder. same goes for the pages folder.
Now that we are done structuring let's move one to setting up our routes.
Setting up the react router.
recall that during installing I installed a package called the react router DOM.
The React Router DOM is an npm package that enables you to implement dynamic routing in a web app. It allows you to display pages and allow users to navigate them. It is a fully-featured client and server-side routing library for React.
We can implement the React Router packages using The following steps.
first, import browser router into index.js file
Then wrap up the application with <BrowserRouter>.
import { BrowserRouter } from "react-router-dom";
import App from "./App";
import reportWebVitals from "./reportWebVitals";

const root = ReactDOM.createRoot(document.getElementById("root"));
root.render(
  <React.StrictMode>
    <BrowserRouter>
      <App />
    </BrowserRouter>
  </React.StrictMode>
);
Next, import routes into app.js file. Then define the <Routes>.
An application can have multiple <Routes>. This project only has one.
import "./App.css";
import { Routes, Route } from "react-router-dom";
import TestErrorBoudary from "./components/TestErrorBoudary";
import NoMatch from "./components/NoMatch";
import Navigation from "./components/Navigation";
import HomePage from "./components/HomePage";
import TallyCounter from "./components/TallyCounter";
import About from "./components/About";
import { ErrorBoundary } from "react-error-boundary";
import DetectError from "./components/DetectError";

function App() {
  return (
    <>
      <ErrorBoundary FallbackComponent={DetectError}>
        <Navigation />

        <Routes>
          <Route path="/" element={<HomePage />} />
          <Route path="tally" element={<TallyCounter />} />
          <Route path="about" element={<About />} />
          <Route path="testError" element={<TestErrorBoudary />} />
          <Route path="*" element={<NoMatch />} />
        </Routes>
      </ErrorBoundary>
    </>
  );
}

export default App;
Route: Route is the conditionally shown component that renders some UI when its path matches the current URL.
Element: It refers to the component which will render on matching the path.
<Route> has a path of / and renders the home page.
<Route> has a path of * Which will render The 404 page.
<Route> has a path of about Which will render The about page
<Route> has a path of testerror Which will render The testerrorboundary page.
Navigations
create links to our components..
Link component uses the to prop to describe the location where the links should navigate
I Started by importing NavLink or Link into my navbar.js and then i used them as to navigate the pages in the application
import { NavLink } from "react-router-dom";
<nav className={navBurger ? "menuNav" : "hideNav"}>
        <div className="middle">
          <ul>
            <li>
              <NavLink
                className={({ isActive }) => (isActive ? "activate" : "")}
                to="/"
                end
              >
                Home
              </NavLink>
            </li>
            <li>
              <NavLink
                onClick={(e) =>
                  e.target.addEventListener("click") ? !navBurger : navBurger
                }
                className={({ isActive }) => (isActive ? "activate" : "")}
                to="/tally"
              >
                TallyCounter
              </NavLink>
            </li>
            <li>
              <NavLink
                onClick={(e) =>
                  e.target.addEventListener("click") ? !navBurger : navBurger
                }
                className={({ isActive }) => (isActive ? "activate" : "")}
                to="/about"
              >
                About
              </NavLink>
            </li>
            <li>
              <NavLink
                onClick={(e) =>
                  e.target.addEventListener("click") ? !navBurger : navBurger
                }
                className={({ isActive }) => (isActive ? "activate" : "")}
                to="/testError"
              >
                TestErrorBoudary
              </NavLink>
            </li>
          </ul>
        </div>
      </nav>
Path specifies a pathname we assign to our component
Now that the routes has been implemented . It is time to implement the counter. First I navigate to the counter.js file and then import usestate .
import { useState } from "react;
Next i worked on the functions i want it to perform, which is increment, decrement, and reset.
const Counter = () => {
  const [tally, setTally] = useState(0);
  const [activeLed, setActiveLed] = useState(false);


  const countIncrement = (e) => {
    e.preventDefault();
    setTally((prev) => prev + 1);
  };
  const countDecrement = (e) => {
    e.preventDefault();
    if (tally > 0) {
      setTally((prev) => prev - 1);
    } else {
      setTally(0);
    }
  };
  const resetCount = (e) => {
    e.preventDefault();
    setTally(0);
    document.getElementById("popUp").style.display = "none";
  };
  const popUp = (e) => {
    e.preventDefault();
    let warning = document.getElementById("popUp");
    warning.style.display = "block";
  };
  const undo = (e) => {
    e.preventDefault();
    let warning = document.getElementById("popUp");
    warning.style.display = "none";
  };
After writing the functions we will be needing a body or a structure to carry out the above function
return (
    <div className="counter-container">
      <section className="counter">
        <div className="counter-display">
          <div className={`${activeLed ? "led" : "display"}`}>
            <p>{tally}</p>
          </div>
          <div className="reset-n-led">
            {activeLed ? (
              <div>
                <button
                  onClick={() => setActiveLed(false)}
                  className="led-btn"
                ></button>
                <small className="small">LED</small>
              </div>
            ) : (
              <div>
                <button
                  onClick={() => setActiveLed(true)}
                  className="circle"
                ></button>
                <small className="small">LED</small>
              </div>
            )}

            <div>
              <button onClick={popUp} className="circle"></button>
              <small className="small">reset</small>
            </div>
          </div>
          <div className="grid">
            <div>
              <button onClick={countIncrement} className="count">
                +
              </button>
            </div>
            <div>
              <button onClick={countDecrement} className="count">
                -
              </button>
            </div>

          </div>
        </div>
      </section>
And voila here goes our counter app😊😄
Now That our counter app has been created successfully. Let us walk through the rest of the pages in this application.
About page.
import React from "react";
import "./styles/about.css";
const About = () => {
  return (
    <div>
      <section className="about">
        <h1>About</h1>
        <p>This Is an Altschool exam project.</p>
        <p>
          it is a tally counter app that performs increament, decrement and
          reset functions
          <br />
          this app contains several pages, thers is the home page, about page,
          tallyCounter page and the error boundary testing page
        </p>
        <h1>Technologies Used</h1>
        <p>
          <ul>
            <li>React</li>
            <li>Git & Github</li>
            <li>Netlify</li>
          </ul>
        </p>
404 page.
The 404 page is the page that will be displayed when a user enters a path that does not match any of the path in this application.
import React from "reHact";
import error from "./images/404.jpg"
const NoMatch = () => {
  return <div className="errorPage">
  <img src={error}  alt="404 Page"></img>
  </div>;
};

export default NoMatch;
ErrorBoundary.
first let's understand the term error boundary.
Error boundaries are React components that catch JavaScript errors anywhere in their child component tree, log those errors, and display a fallback UI instead of the component tree that crashed. Error boundaries catch errors during rendering, in lifecycle methods, and in constructors of the whole tree below them.
to implement error boundary into this application, we should start with the installation
npm install react-error-boundary
Next, create a detectError.Js file which will serve as the fallback UI for when a jsx error occurs.
import React from "react";

const DetectError = ({ error }) => {
  return (
    <div className="error-detect">
      <p>{error.message}</p>
      <p>A jsx Error Occured Somewhere</p>
    </div>
  );
};

export default DetectError;
Next, import error boundary into the app.js file and then wrap our entire application in it.
The errorBoundary tag takes a fallbackcomponent prop in which we will place the detecterror fall back UI
import "./App.css";
import { Routes, Route } from "react-router-dom";
import TestErrorBoudary from "./components/TestErrorBoudary";
import NoMatch from "./components/NoMatch";
import Navigation from "./components/Navigation";
import HomePage from "./components/HomePage";
import TallyCounter from "./components/TallyCounter";
import About from "./components/About";
import { ErrorBoundary } from "react-error-boundary";
import DetectError from "./components/DetectError";

function App() {
  return (
    <>
      <ErrorBoundary FallbackComponent={DetectError}>
        <Navigation />

        <Routes>
          <Route path="/" element={<HomePage />} />
          <Route path="tally" element={<TallyCounter />} />
          <Route path="about" element={<About />} />
          <Route path="testError" element={<TestErrorBoudary />} />
          <Route path="*" element={<NoMatch />} />
        </Routes>
      </ErrorBoundary>
    </>
  );
}

export default App;
Testing error boundary
to test if our error boundary is working.
Create a testErrorBoundary.js file In which we will intentionally commit a js error.
import React, { useState, useEffect } from "react";

const TestErrorBoudary = () => {
  const [error, setError] = useState(false);
  const [femaleUsers, setFemaleUsers] = useState([]);

  useEffect(() => {
    const fetchFemaleRandomUser = async () => {
      const response = await fetch("https://randomuser.me/api/?results=50");
      const { results } = await response.json();
      setFemaleUsers(results);
    };
    fetchFemaleRandomUser();
  }, []);

  return (
    <div className="testError">
      <button
        onClick={() => {
          setError(!error);
        }}
      >
        TestErrorBoudary
      </button>
      {error ? <div>{femaleUsers}</div> : <div>
      </div>}
    </div>
  );
};

export default TestErrorBoudarcy;
And that my peeps, is how I created a counter app, a 404 page and a error boundary testing page with React.
Thank you for reading my very first Techticle. I hope I have helped a little.
Cheers to more Techticles.